A number of Department Application services are only accessible to users who connect to the University Network using a private VPN connection. VPN connections are encrypted and require user authentication before granting network access.
The instructions below are intended for installing the CISCO compatible openconnect VPN client on Debian/Ubuntu derivatives of Linux to connect to the Universities’ CISCO VPN Service.
Install the Network Manager Client
From the command line terminal, install the network manager plugin for openconnect:
sudo apt install network-manager-openconnect-gnome
Configure the VPN Client
Using the Gnome “Activities” menu, start the “Settings” application and select “Network”. Under the VPN settings, click the + sign to add a new VPN connection type.
-
Select “Multi-protocol VPN client (openconnect)” from the list of VPN client software.
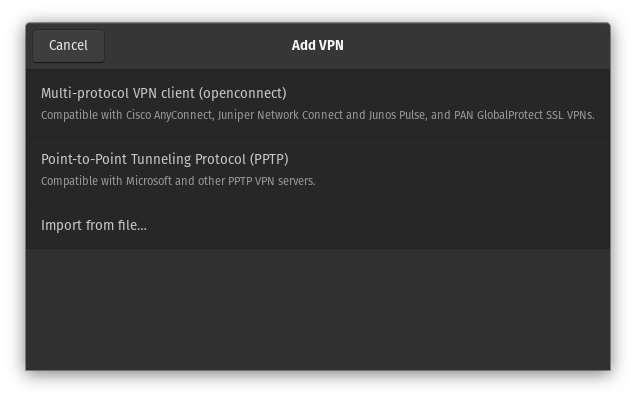
-
In the “Add VPN” window, enter
vpn.uvic.caunder the Gateway, and click the “Add” Button.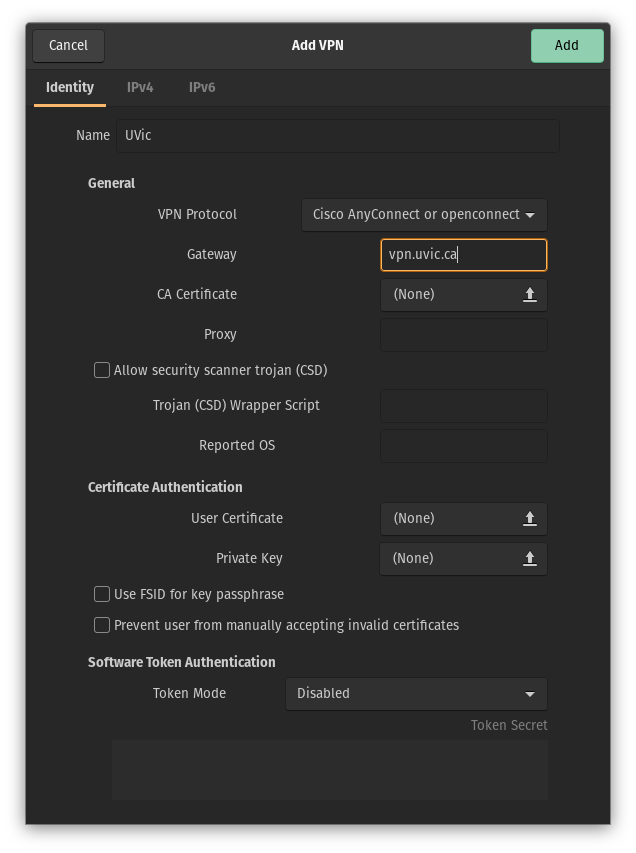
Activating the VPN Client
Once configured, you can activate the VPN connection through any of the following methods to create a private tunnelled network connection to the University network:
- Using the Gnome System Tray in the Main Title Bar at the top of your desktop screen, right click the Network Icon, and select VPN > UVic
- Using the “Activities” Menu, select “Settings” > “Network” > “VPN” > “UVic”
Once activated, you will be prompted for your NETLINK ID and password. After authenticating you will see a small “key” show up on your System Tray indicating that your VPN connection is activated.
