winscp is a Windows GUI file transfer software that can be used to copy files to remote servers using SFTP.
All modern operating system platforms now have native support for command line SFTP file copies, but most users will want a GUI client for drag and drop file copy between hosts. Windows does not provide a native GUI SFTP client, so third party software is required (like cyberduck or winscp)
SFTP using WinSCP
After downloading and installing winscp application:
-
Start the WinSCP application, and a login window will automatically prompt you for credentials.
-
Enter the server address information, your Netlink or COSI credentials.
- For web publishing to a personal webhome directory, specify the server as sftp.csc.uvic.ca (or sftp.cs.uvic.ca for COSI domain). Click connect, and accept the server host key. In the right-hand panel, open the /public_html as the destination path for the file copy.
- For web publishing to a shared group website, specify he server as sftp.csc.uvic.ca (or sftp.cs.uvic.ca for COSI domain).Click connect, and accept the server host key. In the right-hand panel, open the /htdocs as the destination path for the file copy.
- For copying data to or from your Department Home directory, connect to one of the Department’s linux login servers as the destination server. Click connect, and accept the server host key. The right-hand panel will open in your root of your home directory (H: drive).
- For copying data to or from a COSI Shared Group directory, connect to the COSI linux.cs.uvic.ca login server. Click connect, and accept the server host key. In the right-hand panel, navigate to the /groups/cosi_
researchgroupas the destination path for the file copy.
SSH-Keys with Winscp
If you intend to use an SSH-KEY for authentication with winscp, you should follow the SSH-KEY tutorial before to create a public/private key pair before following these instructions below:
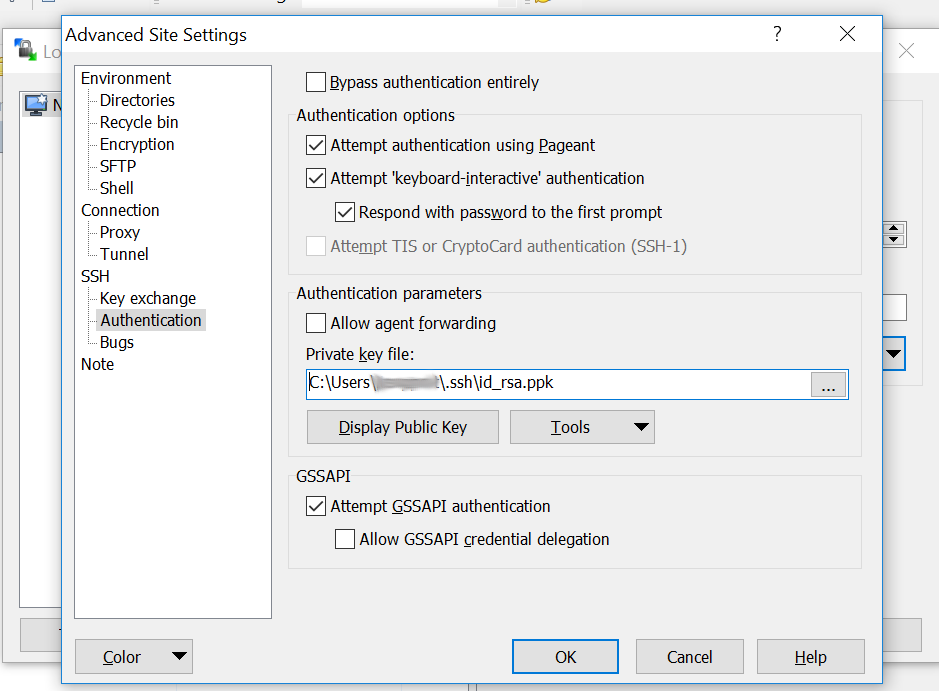
- Start the WinSCP application and click the “Advanced” button in the login screen.
- Select SSH > Authentication from the advanced site settings.
- In the Authentication Parameters,
- Click the “…” button to open the file tree to specify your private key file. By default, Windows creates private SSH-KEY files in:
C:\Users\<username>\.ssh\id_rsa
By default winscp filters for *.ppk files only, you must click the file extension drop down menu to change the default filename extension to include “All Private Key Files id”.
Once your private key is selected, click OK. WinSCP will prompt you to allow it to convert the private key to a *.ppk formated SSH-KEY file.
More Information
Tutorial: Authenticating with SSH-Keys
Support: Department Network Storage
Support: Web Publishing to Department Web Servers